Earth Day crafts
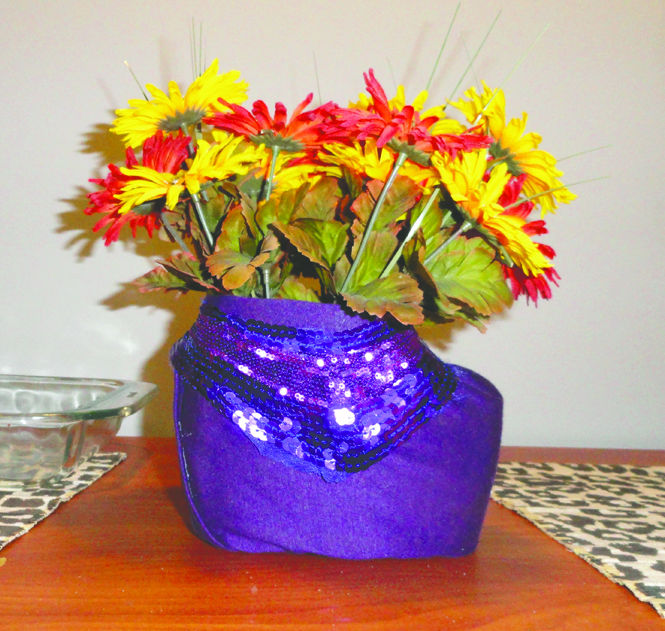
Photo by Rachel Hagenbaugh.
April 21, 2011
Earth Day is here, as is spring-cleaning. Save some money and use everyday supplies such as empty water bottles, yarn and toilet paper rolls to construct homemade decorations in celebration of Earth Day.
Make a necklace out of recycled paper.
Supplies
-Newspaper or magazine pages
-Glue that dries clear
-Craft paint
-Sandpaper
-Drill
Step 1: Rip the paper into small pieces and put them in a large stockpot.
Step 2: Cover the paper in boiling water and let sit for an hour, stirring occasionally to help break up the paper.
Step 3: Drain.
Step 4: Add glue. Make sure it’s enough glue to hold the paper together when rolled into a ball.
Step 5: Roll paper into desired size balls while squeezing out as much of the excess water and glue as possible.
Step 6: Let the balls dry for a couple days, rolling them every several hours until they are completely dry.
Step 7: Once dry, sand each bead down to remove rough edges.
Step 8: Drill a hole in each bead big enough to fit string or other desired material through it.
Step 9: Paint the beads in desired colors and designs with craft paint.
Step 10: Put on a coat of varnish.
Toilet Paper Roll Wreath
Supplies
– A significant amount of toilet paper or paper towel tubes
– Hot glue gun or white glue
– Lots of paper clips if white glue is being used
– Paint (optional)
Step 1: Cut tubes into evenly sized rings. All the rings should have the same depth.
Step 2: Plan a design for the wreath. Assemble a series of peace signs or flowers together.
Step 3: Paint rings if desired.
Step 4: Glue the rings together in the desired arrangement. If white glue is being applied, use paper clips to hold the rings together while it dries.
Decorative Containers
Supplies
-Recycled plastic detergent bottles, bleach bottles or floor cleaner bottles
-Fabric
-Polyvinyl woodworking glue
-Sharp scissors or heavy craft knife
-Clothespins
Step 1: Cut bottles where desired to remove top and handle portion creating a nice, shaped container.
Step 2: Thoroughly wash and dry container.
Step 3: Place container on fabric and bring fabric up around the sides of the container to estimate where the fabric should be cut. The fabric should be large enough to wrap around the sides and base of the container.
Step 4: Coat the outside of the container, including the base, with glue.
Step 5: Carefully pull fabric up the sides of the container, smoothing out any wrinkles.
Step 6: Tuck the fabric in corners so the fabric lays flat on all sides.
Step 7: Secure fabric to the top edges of the container with clothespins and let dry.
Step 8: Add flowers or writing utensils and set on desk to admire.
Recycled Sunburst Mirror
Supplies
-An old book (One that is going to get torn up)
-A square base, such as thick cardboard
-Small round mirror
-Glass pebbles or mosaic pieces
-Hot glue gun
Step 1: Attach mirror to base.
Step 2: Roll pages into cones, making all of them the same size.
Step 3: Glue cones to the base, placing the smaller end of the cone at midpoints of the circle, and start filling in the empty spaces around the mirror.
Step 4: Keep gluing until the entire diameter of the circle is filled with the cones.
Step 5: Place glass stones or mosaic pieces on top the project in desired areas, and secure with hot glue gun.
Step 6: Add a hanger to the back by gluing a piece of string to the base and securing it with hot glue and circles cut from cereal boxes.
Contact Rachel Hagenbaugh at [email protected].